2022/01/24

123... Breathe - StencilGirl Collaboration post


Hi everyone, its been a while since I've posted here. I've been hanging out on Instagram mostly these past years. But I do miss sharing some stuff here now and then. What better way is there to start off blogging again than to reveal the collaboration piece I did with StencilGirl columnist Tina Walker, which is all about self portraits.

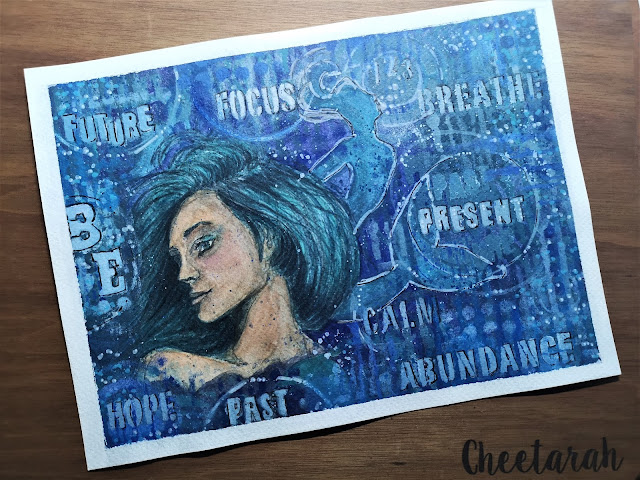
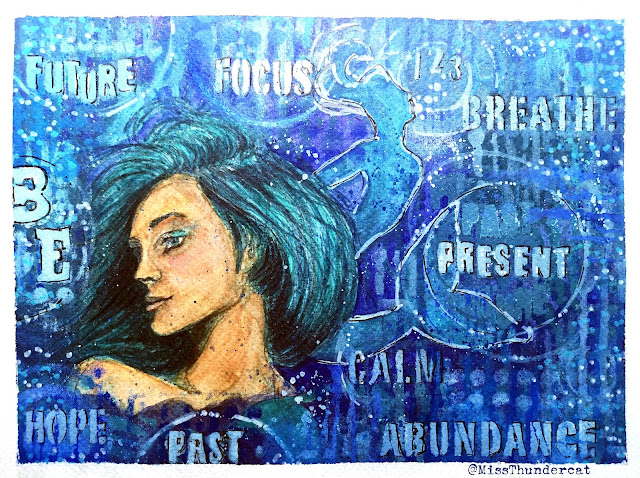
Collab participants were challenged to create a self portrait, using any mediums, design styles, or techniques of choice, but with the caveat, to create a portrait as they see themselves. This is what I made for the challenge using a whole heap of my fave StencilGirl Stencils and a lot of different media. 


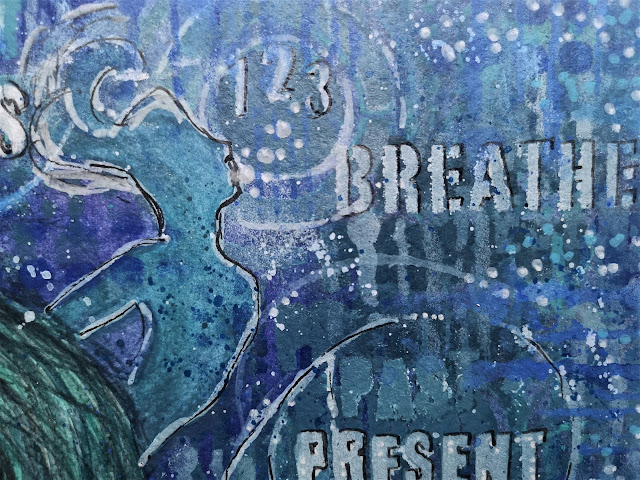
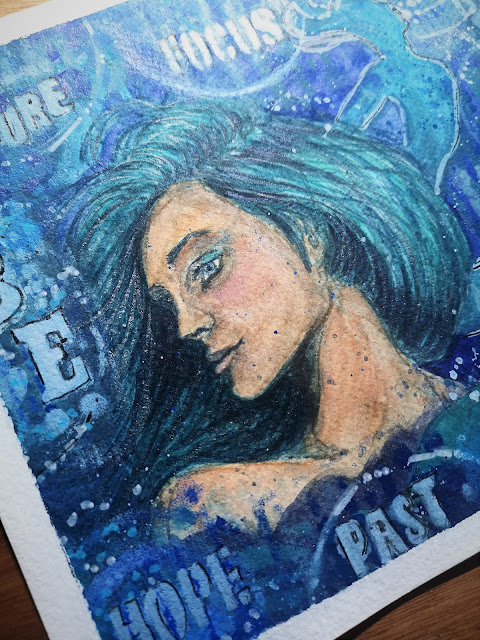
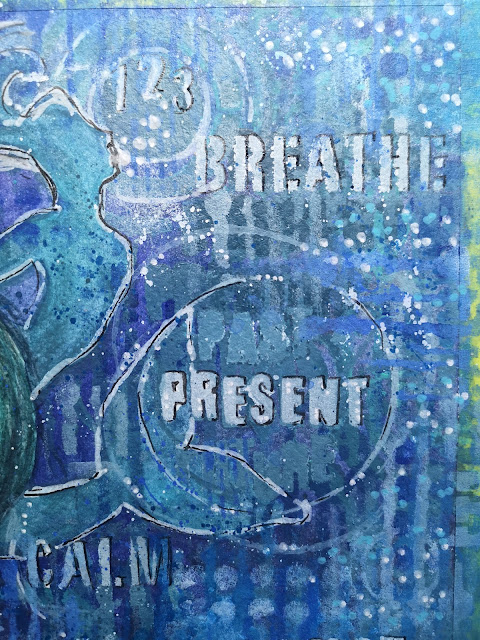
I started with a face stamp on watercolor paper. and wanted to create an underwater mermaid scene. This piece is all about releasing the inner mermaid and to dive deep and just breathe through it. 


I worked with a lot of layers of acrylic paint over top of the watercolor, but made sure there were transparent layers for depth, and also added some interference colors for sparkle effect. 


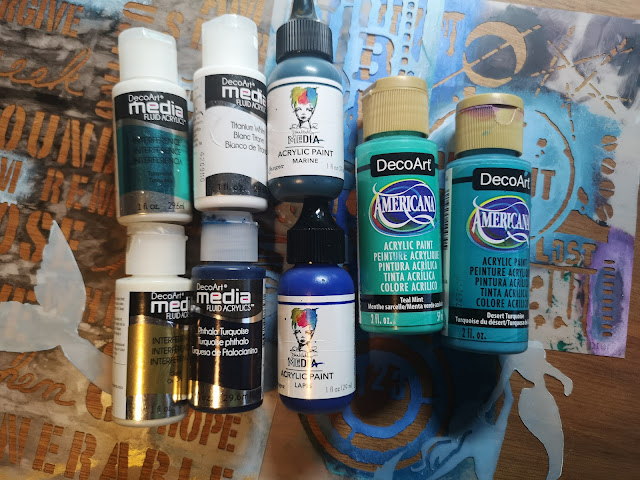
These are the materials I used, decoarts and dina wakely acrylics.

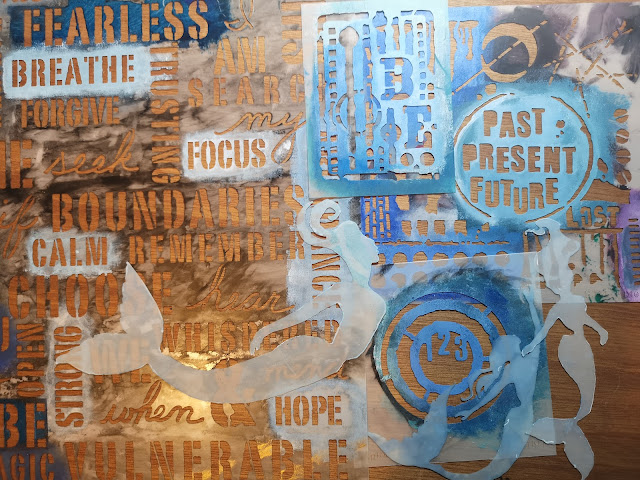
And all the stencils I used

Mermaids

Past, Present, Future 

123 

ATC mix up Apter

I really enjoyed making this piece for this collaboration project. Please have a look at all the wonderful works by other talented artists in the blogpost HERE 

Thank you for stopping by and have a wonderful week.

xo Cheetarah

2020/01/31

Imagination vs Knowledge

A little  while back I had this a guest post on the StencilGirl blog and wanted to share this here as well.
For a while now I have been experimenting with watercolors and creating patterns with stencils. And today I would like to share a project which was a result of the experimentation which is an interactive watercolor painting.


The base is a large piece of watercolor paper by Viking 1914. I used the landscape pad which is 15x42 cm, 310gms in weight & 50% cotton.  The paper was glued on all sides to the block so the paper doesn't warp with using a lot of water. Great quality paper and having it taped down is very important for a successful watercolor painting. The paints I used are from Sennelier, a french professional watercolor brand which I have filled the wells of my Koi travel pocket box with. The brush I am using is a large quill brush and I made sure to have 2 water cups, one for cleaning and one for mixing. I traced the face silhouette from Seth Apter's Borderliners Large stencil (a dec. 2017 StencilGirl® StencilClub stencil release) on the right hand side and then went to work to create a galaxy color composition over the entire page.


When working with watercolors, timing is key, so I do not have many mid process pictures. I've worked on these layers for about 30-45 minutes, adding color and letting them blend out in a process you have to practice with patience and appropriate speed. I have watched many tutorials on YouTube on how to create galaxy watercolor paintings and this is a very simple & effective tutorial: https://youtu.be/ZFVLLjS912E and I have applied the same technique in my painting.


After the piece was thoroughly dry I took a medium damp cloth and created texture by removing some color over the dotted pattern in the large stencil. I only did this on the aria's opposite the silhouette.


I made sure the silhouette was standing out by using contrasting colors and keeping the edge of the line as sharp as possible. Darkened the face up more and used an opaque white ink for the starker contrast. Now to add more patterns in the piece.


With a black paint pen I have traced the large bubbles which were in the same large stencil as the face, then colored them in with the opaque white acrylic paint. I also splattered some of the white paint over the painting. The added in the quote "Imagination is more important than Knowledge" with the black paint liner. The quote by Einstein is found on the Pen & Ink Large stencil by Lesley Riley.


After I was done with the painting I took it off the watercolor block I folded the painting because I planned to make an interactive piece out of it.

I took a semi transparent acrylic dark blue and a semi opaque lighter blue paint and sponged it through the large numbers of the Borderliners stencils. Then traced the numbers in with a black paint liner. I cut out the silhouette face so it folded over the quote. I traced the quote lines with a wite paint liner for some contrast. 
This is what it looks like when you open up the side of the face. With an exacto knife I cut open a portion of the silhouette line, folded in half to glue it in place like this. Added the same numbers border with a mix of the paint and traced it with a white paint liner. With this last detail added I called the interactive painting done. Here are some close up pictures. 


I hope you enjoyed seeing how this interactive painting came together and that you might try making something like this yourself. Have a lovely day.

xo Cheetarah

2019/10/20

Art Journal: Valley of the blind - VLVS!


Over at VLVS! blog I am sharing this art journal spread using lovely Banksy stamps and a Whimsical Cyclops.  Go check out the blogpost to see how I have made it. 

Thanks for stopping by and have a lovely day. 


2019/10/04

Art Journal: Perspective of time - VLVS!


Hey everyone, it's been a while I shared something on the blog. Life has been super busy. Finally had some time to art journal again and made the above spread for a VLVS! blogpost. Head on over to see how I made it and what I used. 

Thank you for stopping by and have a lovely weekend. 


2019/04/26

StencilGirl DT - Squared off blog hop!

Hello and welcome! 
You have arrived at the StencilGirl® Creative Team’s Squared-Off Swap Hop.
Hey all, today over at StencilGirl® Talk we have a bloghop going on in which we at the creative team swapped a bunch of square collaged stenciled pieces which we then corporate in an art piece ourselves. I received squares from my  team mates Slivia, Debi, Katie and Sunila & Aditti. And I have made an art journal page where I used the squared pieces and cut out the fantasy animals from this stencil Figments of Imagination by Carolyn Dube against the backdrop of this gorgeous scenery stencil by Mountain Landscape by Andrew Borloz. The sentiment "believe you can & find magic" is made with the Uplifting words stencil by Carolyn Dube.

It was really fun to have to come up with something with the materials that I have received from my fellow team mates, via our super CT coordinator Carol. Have a look at our blog to see what the others in our team came up with an comment on each blog to be entered in the giveaway prize.


Dots2Lines, Aditi & Sunila Mahajan
https://dotstolinesblog.wordpress.com/

Natalie May
https://happydaks.blogspot.com/2019/04/the-spectacular-stencilgirl-squared-off.html

Trena Brannon
https://trenabrannon.typepad.com/stamping_painting_and_col/2019/04/the-spectacular-stencilgirl-squared-off-swap-hop-big-hair.html

Sandee Setliff
https://inthehillsofnorthcarolina.blogspot.com/2019/04/cosmic-penguin-does-spectacular.html

Kristin Peterson
https://www.alteredstatesstudio.com/blog/paper-swap

Tina Walker
https://adogslife-thirteen.blogspot.com/2019/04/the-spectacular-stencilgirl-squared-off.html

Claudia Neubacher
https://vonpappe2.blogspot.com/2019/04/the-spectacular-stencilgirl-squared-off.html

Katie Lamb
https://whatkatiedid2.blogspot.com/2019/04/the-spectacular-stencilgirlr-squared.html

Jill McDowell
https://itsjustjillmcd.typepad.com/blog/2019/04/origami-mixed-media-frames-for-mini-collages.html

Kristin Williams
https://www.ephemerapaducah.com/stencilgirl-squared-off-swap-hop/

Debi Adams
https://wp.me/p7pzwG-1ic

Silvia Souza
http://www.silviasouza.com/blog

YOU ARE HERE:
Cheetarah Cheda
https://missthundercat.blogspot.com/2019/04/stencilgirl-dt-squared-off-blog-hop.html

Louise Nelson
http://louise-justloolabelle.blogspot.com/


The more blogs you comment on the more chances you have a chance to win one of four $25 gift certificates for stencils from StencilGirl® Products. Comment by May 3, 2019. Winner notified by email May 6th on StencilGirl Talk.

Have an awesome weekend and thanks so much for stopping by!

2019/04/13

StencilGirl DT - Stencil Poetry - Mermaid Songs


Hi all, this is my final post for StencilGirl® Products as part of their Creative team and I have really enjoyed making this art journal page based on one of my current fave songs. Please head to the post on StencilGirl Talk to see which song that is and how I made this. Have a wonderful weekend. 


2019/04/08

Let fear be your compass - VLVS!


Hi all, earlier this year I made this art journal page for my first guest DT post over at VLVS! and there is a video tutorial for it too. Head on over to the blog post to see how I made it.

Thanks for stopping by and have an awesome day.


2019/01/08

Art Journal: Just BE yourself (in love and friendship) - StencilGirl®

I hope you all had a wonderful start in the new year so far.
With the holidays last month I've taken some time to spend with friends and family & deepen the bond we have during this time of festivities and renewal. My hope is that you did the same.


On the StencilGirl® blog we are extending the focus on love and friendship as a theme this month and I wanted to share this art journal page I made while contemplating this theme. It's an intuitive art journal page for which I used minimal products and a few wonderful ATC format stencils from StencilGirl® Products which also are the perfect size for pocket sized journals like I am using.


Hop over to the blog post HERE to see a little video and more close up pictures as well as my views on this month's theme, LOVE and Friendship. 

 If you feel like playing along with the theme and share your creations, check out StencilGirl® Instagram for the details.

Thank you for stopping by!
Have an awesome day and talk to you again soon.


2019/01/04

New DT announcements for 2019!

Hi all, hope you have had a great start into the new year already. I'm excited to share a few announcements today regarding my Design Team work. 

First off I'm happy to say that I've been selected as one of the guest designers for Viva Las VegaStamps! in the first half of 2019. I'm honored and excited to be part of this amazing team with talented ladies and happy to represent this wonderful stamp company again. 
Image may contain: 16 people, people smiling

See the announcement on their blog HERE and be sure to check out the links to social media from the other team members as well as the monthly challenges which you can play along with.

The second announcement is that I'll continue working with Craft Stamper blog as part of their Take it Make it inspiration design team. I am excited to stay on for another year to provide some inspiration for the monthly challenges, which are open to everyone who uses rubber stamps in their work.
 
The new challenge for January is on the blog today and we hope you'll join in the fun and link up projects for a blog/magazine feature possibility. Also you could be winning the following prizes this month:
Image may contain: 1 person

And of course my work for the awesome StencilGirl® products will continue on this year - stay tuned for another post of mine on StencilGirl Talk this coming week. 

That's definitely a wonderful start for the new year on my part. 
I would like to thank you for your continued support here and on my other social media hang outs. 
Thank you for stopping by today and have an awesome weekend. 


2018/12/21

Art Journal: SisStars Do small things with great love - AALL & Create


Hi and happy winter Solstice! With the holidays and new year nearly upon us, it's time to spend with friends and family to deepen the bond we have with them during this time of festivities and renewal. I have an art journal page to share with you which I have dedicated to my sisters, or as I like to call them, my SisSTARS because they definitely have a bright shining spot in my heart. I've used AALL & Create products for this and I'll share the process of making the journal spread with you now. 

 
So in my project last week I showed you how I used the numerical circles from set #110 to make a season themed card. Since I only used a portion of the stamp, I also cut out circles and leafs with punches to use in this project. I also cut out the fern, but alas that didn't fit into the journal spread this time. Good to have for another project :) 

I started with gluing the circular and leaf pattern down randomly on the pages in my junk journal with matte medium. Some aria's have been embossed with copper embossing powder so that will have some extra texture. 

I applied some gesso over it and then raked the edge of a plastic knife through the gesso for some interesting texture. When that dried I applied modeling paste through the Lotz of Dotz stencil #39 over some empty spots. The teeny tiny dot pattern also remind me of stars. Now to add some color. 

I took my small foam brayer and a few cool blue colors, ranging from light to dark to add depth and contrast on the pages. Then to add color under the stenciled aria's I used some home made shimmer sprays from Cosmic Shimmer and Lindy's Gang.
 
I used some darker grey colors like pewter (cosmic shimmer) and black forest (Lindy's gang) and made sure that the most of the white was saturated with color. To get more of the contrast back I traced the patterns with a blue Stabilo all pencil & activated them with water to get the shading going. I also stamped the grungy flower of set 123 randomly over the page. I left it to rest and took

The next day I added a deeper layer of color over the page and some scribbles & sayings like Pinky Swear, Keep your promises always, stay grounded in gratitude and a few others to signify the sisterly bond. The word stars is a die cut from DieNamics and cut out of starry scrap book paper. I used black forest ink to darken the background and white to highlight the word. The image of the sisters are from Tim Holtz vintage people pack. To ground them I added hemp twine and a skelleton leaf. The text stamp is from set 123 as well and I stamped it on a contrasting color to make it pop out more. 

I definitely love how this turned out as an hommage to my lovely SisStars. 

These are the products I used: 


This is also my last project as Guest Designer for AALL& Create. Thanks to Autour de Mwa for inviting  me on board these past months, I really appreciate it and enjoyed working with the products. You can find the stockist HERE and be sure to check out the newly released collection of December for another array of great designs :)

Thank you all for stopping by today. I really appreciate the support you all have given me here and over at my other social channels over the year. Thank you, you're all STARS for sure! Wishing you all a wonderful holiday season and transition to the new year. May you spend it with the people you hold dear.

See you in the new year!