Showing posts with label die cut. Show all posts

2018/12/21

Art Journal: SisStars Do small things with great love - AALL & Create


Hi and happy winter Solstice! With the holidays and new year nearly upon us, it's time to spend with friends and family to deepen the bond we have with them during this time of festivities and renewal. I have an art journal page to share with you which I have dedicated to my sisters, or as I like to call them, my SisSTARS because they definitely have a bright shining spot in my heart. I've used AALL & Create products for this and I'll share the process of making the journal spread with you now. 

 
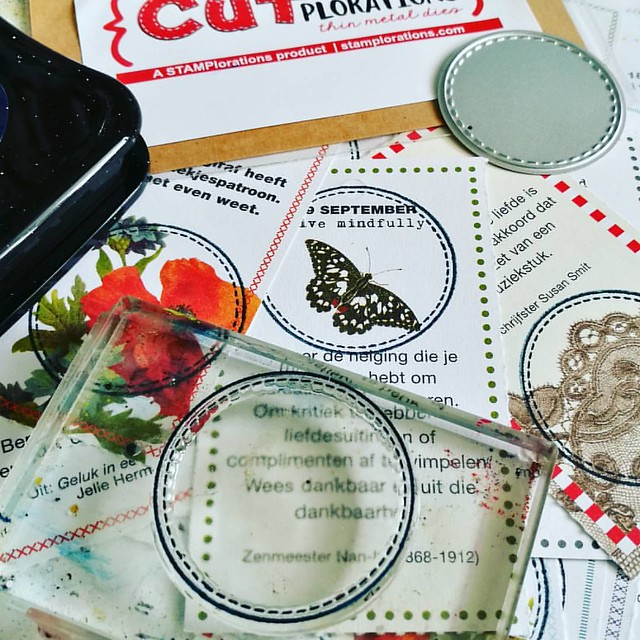
So in my project last week I showed you how I used the numerical circles from set #110 to make a season themed card. Since I only used a portion of the stamp, I also cut out circles and leafs with punches to use in this project. I also cut out the fern, but alas that didn't fit into the journal spread this time. Good to have for another project :) 

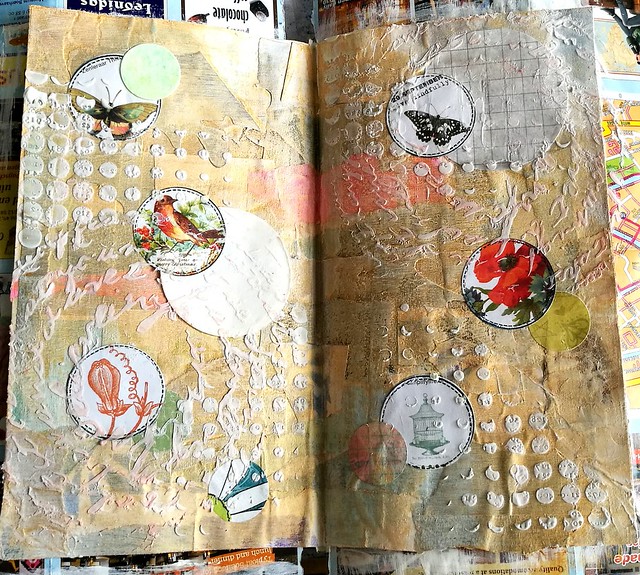
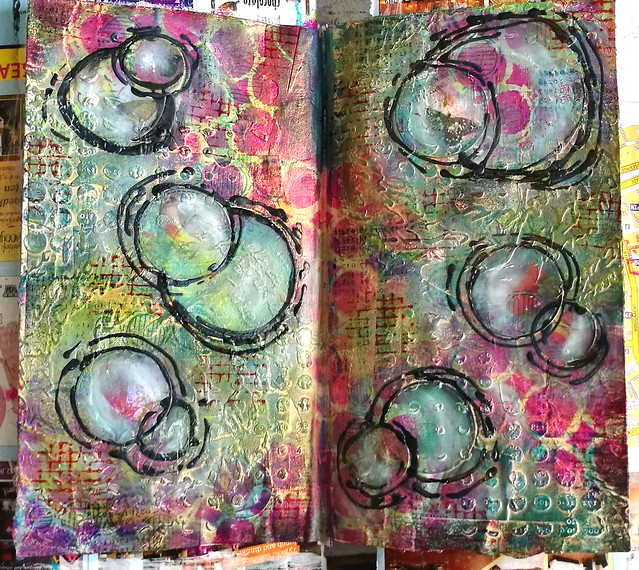
I started with gluing the circular and leaf pattern down randomly on the pages in my junk journal with matte medium. Some aria's have been embossed with copper embossing powder so that will have some extra texture. 

I applied some gesso over it and then raked the edge of a plastic knife through the gesso for some interesting texture. When that dried I applied modeling paste through the Lotz of Dotz stencil #39 over some empty spots. The teeny tiny dot pattern also remind me of stars. Now to add some color. 

I took my small foam brayer and a few cool blue colors, ranging from light to dark to add depth and contrast on the pages. Then to add color under the stenciled aria's I used some home made shimmer sprays from Cosmic Shimmer and Lindy's Gang.
 
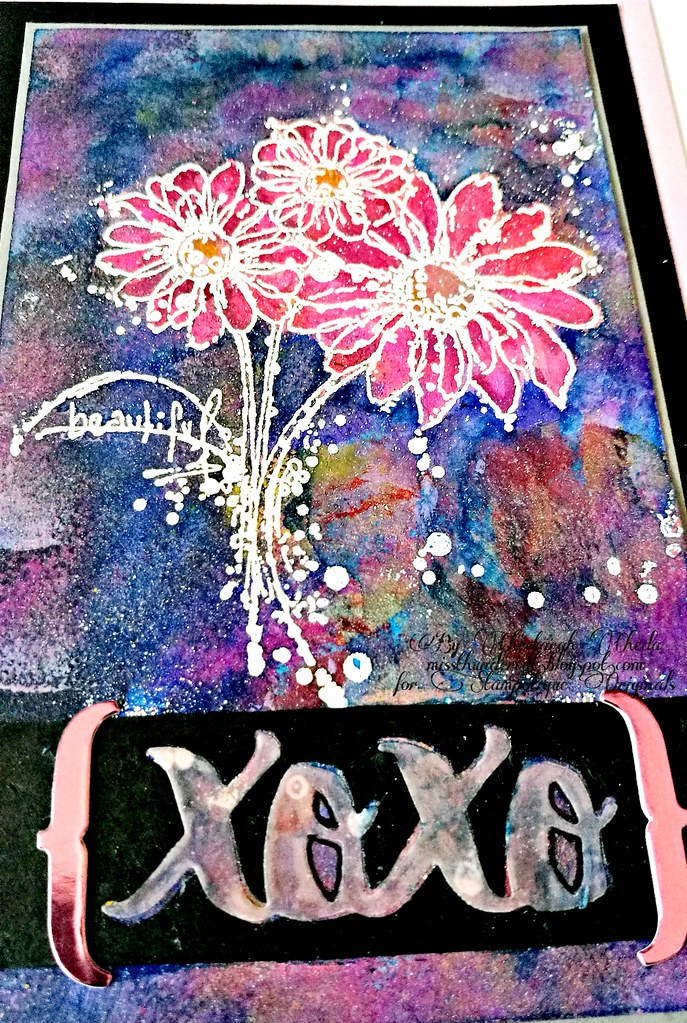
I used some darker grey colors like pewter (cosmic shimmer) and black forest (Lindy's gang) and made sure that the most of the white was saturated with color. To get more of the contrast back I traced the patterns with a blue Stabilo all pencil & activated them with water to get the shading going. I also stamped the grungy flower of set 123 randomly over the page. I left it to rest and took

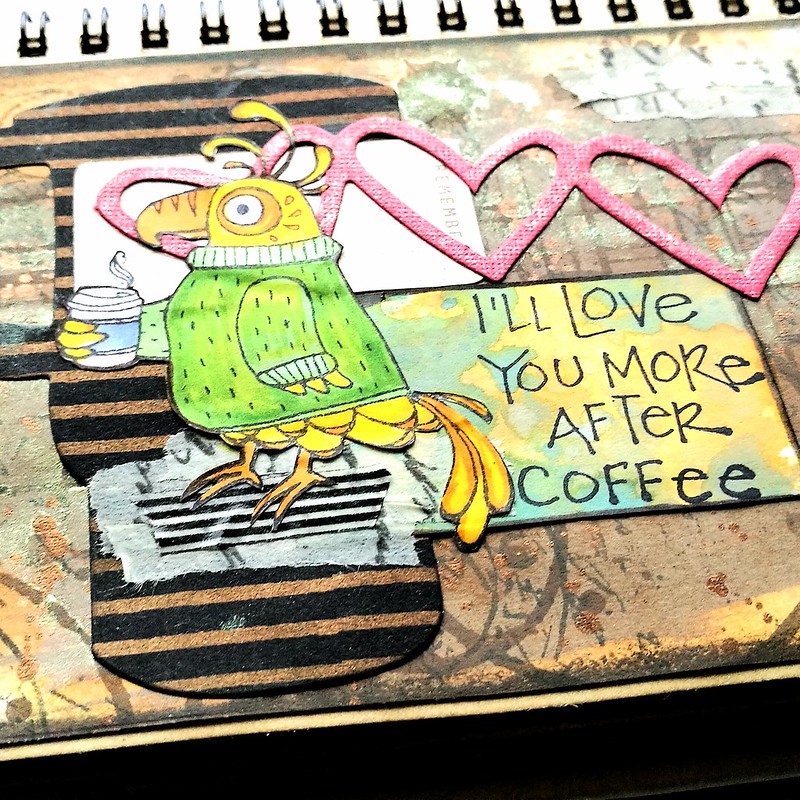
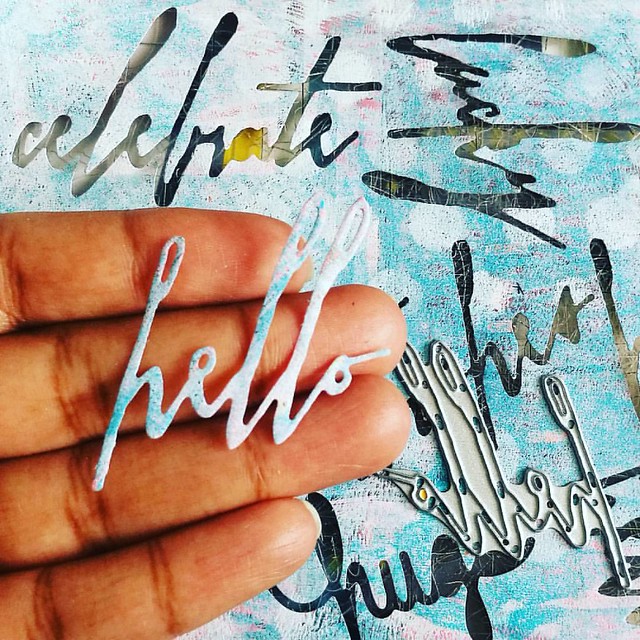
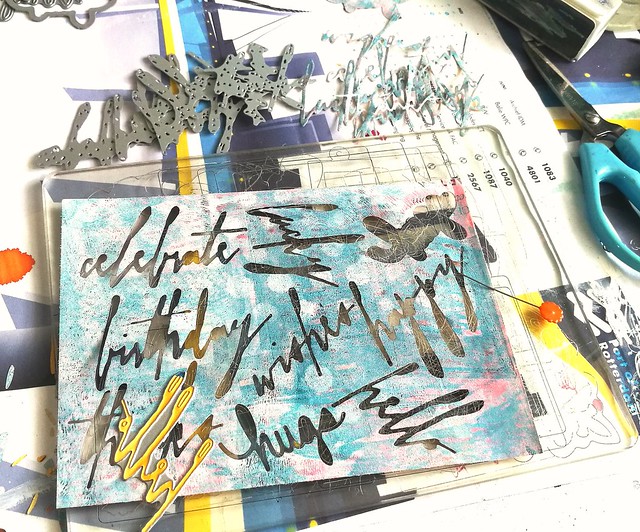
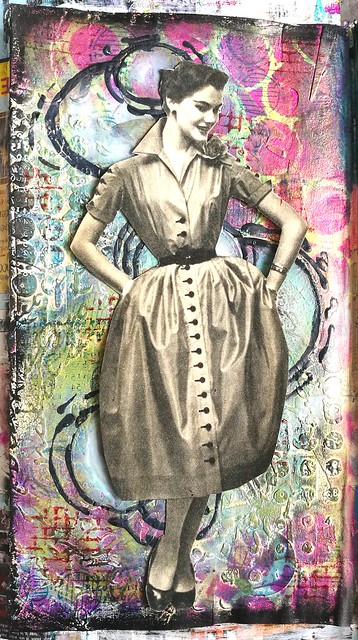
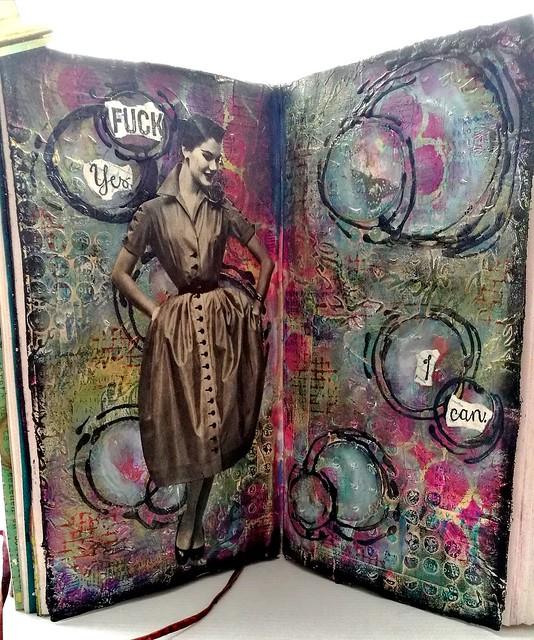
The next day I added a deeper layer of color over the page and some scribbles & sayings like Pinky Swear, Keep your promises always, stay grounded in gratitude and a few others to signify the sisterly bond. The word stars is a die cut from DieNamics and cut out of starry scrap book paper. I used black forest ink to darken the background and white to highlight the word. The image of the sisters are from Tim Holtz vintage people pack. To ground them I added hemp twine and a skelleton leaf. The text stamp is from set 123 as well and I stamped it on a contrasting color to make it pop out more. 

I definitely love how this turned out as an hommage to my lovely SisStars. 

These are the products I used: 


This is also my last project as Guest Designer for AALL& Create. Thanks to Autour de Mwa for inviting  me on board these past months, I really appreciate it and enjoyed working with the products. You can find the stockist HERE and be sure to check out the newly released collection of December for another array of great designs :)

Thank you all for stopping by today. I really appreciate the support you all have given me here and over at my other social channels over the year. Thank you, you're all STARS for sure! Wishing you all a wonderful holiday season and transition to the new year. May you spend it with the people you hold dear.

See you in the new year!

2017/12/15

Hello Sunshine, fancy a cuppa?!

Hello sunshine, fancy a cuppa?

Coffee is always a necessity for me and esp. so in these dark winter days. It's the fuel that helps me through the day. I've made a quirky fun mixed media card using stamps and supplies from my fave companies this year. 
The base is made with Distress Oxides, distress crayons and glimmer mist. 
Coffee cup, beans, splatter and "fancy a cuppa"  stamps from Viva Las VegaStamps!
The sentiment stamp "you and coffee are the best" and Hello Sunshine die cut from Stamplorations 
And the tuckered out person (= me pre-coffee in the morning ;) is Blackeyed from Stampotique Originals

Over at Coffee Loving Card maker's Blog there is a fun blog hop going which I am linking this project to. 

I'm also linking this to the Stamplorations Never Ending anything goes Challenge

Thanks for stopping by and have a wonderful weekend!

2017/11/08

SDC286 - Nature

SDC286- nature

It's another Wednesday and that means a new challenge is live on the Stampotique Designer's challenge blog. This time the theme is nature and I've made an art journal page with a magic ink technique and a mushroom stencil and some wonderful Stampotique stamps; Alice by Janet Klein and a wonderful quote from phrases cube 3 by Terri Richardson.

SDC286 - nature
I used a few flower die cuts from Tim Holtz and DieNamics to create the psychedelic magical forest she is in. Also I just love the amount of snark this quote gives Alice, also she isn't lying, she actually was down a rabbit hole visiting the center of the universe ;) 

Hope this inspires you to play along with the challenge this week. You and link up your project HERE, but please do read the rules before doing so, and if you enter you have the chance to win some cool rubber stamps :) 

Thanks for stopping by and have a wonderful day!


2017/09/04

Heartfelt watercolor note cards (Stampotique New Release september 2017)

simple and sincere notecards

Today I am sharing a few watercolor cards made with some of the newly released Stampotique Originals rubber stamps. There are two beautiful flower bouquets you can make some heartfelt note cards with like I have shown above. What I did with both was emboss the flowers on watercolor paper, then make the background and color in the flowers. die cut the sentiments and piece them together. These watercolors cards are just super fun to make and didn't cost much time at all! You just let the colors work its magic. The watercolors I have worked with here is from Cloves and Honey shimmering watercolors. They just SPARKLE in real life!

september releases stampotique 7
This bouquet is designed by Terri Richardson and I love the delicate flowers together. I chose one color for the flowers to make them pop from the background. The HUGS sentiment is a die cut from Technique Tuesday. And the accolades are from an alphabet sticker set I have.

september releases stampotique 11
This bouquet, called Flos,  is designed by Kassa Hayselden and she drew them in the same style as the popular "kassa's bloom" stamp. I really love this style and also like it has the word beautiful in it. It's a whimsical design with dots and scribbles and just super fun! I paired it with an XOXO die cut from Stamplorations "cutplorations" die. First on black then inlaid the vellum cut out. The accolades are from the same set. The watercolors are just super fantastic in real life!


Don't forget to check our newest Stampotique Designer's Challenge as well. Hope this inspired you to work with watercolors and these gorgeous new flower stamps from Stampotique originals! 

Thanks for stopping by and have a wonderful day :) 


2017/08/03

Art Journal: Remember, I'll love you more after coffee!

Art Journal: I'll love you more after coffee

Today I wanted to share a fun page I created in my spiral pocket art journal. I incorporated a bunch of different elements and experimenting with a little scrapbook lay-out style. Most of the elements I used are combined from different projects out of my "lefTOVERS-scrap box".
The background is made with Distress Oxide, I still have so many left from my very first play session with them, and stamped on it Indigo Blu Ledger, Tim Holz Coffee Rings and splatters, Large VLVS! Coffee rings and Joy Crafts script stamp. All stamped with Java dye ink from Ranger. Then I sprayed some Kiwi perfect pearl mist over it. IRL it does shine a lot more.
Then I built up the layers using die cuts, the coffee mug is from Stamplorations and one I cut from this project, some left over hearts from this project and used some left over papers from yesterday's project to stamp the sentiment on. Which is, as well as the bird, from Stampotique Originals.
I put in a little "remember" tag before the sentiment to make it a sentence. The bird is colored with letraset promarkers on sticker paper and fussy cut out. 

Art Journal: I'll love you more after coffee
I grounded Cocoa Bird on some washi tape and tape a little bit on the right top corner for some balance. Gave the hearts some shimmer with a wink of stella marker and called it done. I really love this page as I imagined the bird being a parrot, echoing this to people who want to talk to me before I had my morning coffee :D

Entering this journal page in the following challenges: 

Simon Says Stamp Monday Challenge - Food and/or Drink 


We gals love our coffee and bling, right? :) 

Art Journal Journey - Poetry in Motion
I thought this would fit the theme as well, though I am SLOW-motion before my coffee, LOL!

Simon Says Stamp Wednesday Challenge - Splatter it

Thank you so much for stopping by and have a wonderful day!


2017/07/12

WIP: Words with meaning!

Hello friends! What are you doing on this lovely Saturday? I am using this fun words die cut from @tim_holtz and @ranger_ink on @gelliarts gelli printed paper. I just love this whimsical handwriting font, don't you? What are you doing on this lovely Satur

After getting my cuttlebug out a few weeks ago and giving it some love, I came completely besotted with die cuts and got myself a few new ones to play with. Like these handwrtiiten celebration words set from Tim Holtz. I just love that font! So my desk was littered with all these die cuts.

die cut mess on my desk
They are so fun to cut out from gelli printed pages and that fun whimsical script will be great for on cards. The only thing is, in my enthusiasm I forgot to back the paper with doublesided adhesive, so it's going to be a pain to glue them on... well thankfully I have a trusty ZIG 2 way glue pen that really is useful for this. Anyone has other tips to glue down delicate die cuts? Please do share :)

Linking up to Julia's WOYWW #423 - and glad to hop off to see what's on everyone's desk this week. Last week I missed it because of this special announcement, and it was my week to share inspiration for the Stampotique Challenge Celebration (which is still going on this week) so while I do hope to participate and visit everyone's desk (well try to anyway) I won't be able to do it every week... but I am sure not everyone can participate every week, right?

Thanks!

I also wanted to say a heartfelt THANKS! to everyone taking the time to visit my blog and post a comment on my work or just to say hi :) It's so appreciated and warms my heart everytime, thank you!! I have a giveaway in the works sometime later this month with all sorts of craft stuff I have been keeping but never use. It's time to give them a new home! So if you haven't yet, please follow my blog so you'll get an update on that giveaway :) 

Have a wonderful "hump day", thanks for stopping by and catch you all later. 


2017/06/21

WIP: It's all coming 'round (F* yes, we can!)

When going out for a day at the beach, the pens come out and play too 😊 These two pretties are from @woodshedpenco  . . . #FPN #fountainpennetwork #fpgeeks #supportsmallbusiness #fountainpen #penaddict #stationeryaddict #papsweden #stalogy #enjoylit
This past weekend was an amazingly hot one. We needed to get out of the house and we went to the beach for a nice walk. We wound up in Katwijk aan Zee where on Sunday the parking is free. Needless to say we were not the only people with this idea! So after a bit of driving to get a parking spot, we had some nice fresh fried Kibbelingen and off to walk to Noordwijk, which is about 45 minutes of leisurely walking. There we sat ourselves down, had a beer (or two) and a Fentimans Rose Lemonade (which is AMZINGLY GOOD - T-Stands for Tuesday girls, have you tried this beverage?!)  and out came our "toys" aka pocket notebooks and fountain pens for a little play session. The above pens are made by Woodshed pen Co, the Creme Brulee I did a post on a little while ago and behold the "mojito"! A thing of beauty!! I just love that minty sea green material. See a fun video of it HERE. After a shared Pizza and dessert, we had our evening walk back to the car. My calves still hurts from all the walking, but it was an amazing day!

Some fun things you can do with stamp and die sets (these are from @stamplorations ) and old 365 #mindfulness calender from @flow_magazine - cut the images out in shapes for buntings or textures for in your artjournal like I have done 😊 . . . #craft
My work in progress for this week is this die cutting project I am doing. Which is incidentally also a question raised at the WOYWW #421 post of today over at Julia's Blog - what is your fave cutting appliance? Mine would be my under used Cuttlebug! I have a flow magazine 365 perpetual mindfulness calendar. But after having it for 5 years, I am perpetually done with it! And of course I could just not throw it away, how mindful would that be? LOL, so I took a little round stamp and die which I bought from SPAMPlorations and put it to good use. I cut out a whole bunch of different images with this fun stamp & die and worked on an art journal page.

Fuck yes, I can - art journal
Here you see the journal page in progress. It has a circular theme to it with coordinating stencils (the crafter's workshop and carabelle studio) and stamping in the molding paste. I'm sorta sad I didn't do a process video for this one because the end result looks TOTALLY different from what you see here now. So I am glad remembered to show at least one work in progress picture here.

Fuck yes, I can - art journal
This is what the background looks like with added color and texture. It's always amazing to see how much color can transform a look of things. I used dylusions paints, caran dáche oil pastels, some Dina Wakley Scribble sticks here and there, dylusions and stampotique texture stamps and black fine liner paint (those handy dandy little squeeze bottles from Dina Wakley) for the circular outlines. I was contemplating on what to put on the pages or just leave it like this. But I had something that would fit just right...

Fuck yes, I can - art journal
This little well dressed lady is cut out from a vintage fashion mag and I just loved the way she looked here. Grey tones on a colorful background, it just fit. Of course, she needed to say something. And the look she has, tell me this...

Fuck yes, I can - art journal
The sentiment is contracted from two different stamps from VLVS, Fuck Head and Yes I can. With a black border around it I called this one done :)

I would like to enter this journal page to the following challenges: 
And seeing I used a STAMPlorations product I am entering the never ending anything goes challenge as well :) 


Pop this on your blog to find us fast!


June is 'Flock of birds' with this juicy mood board

I am sure that we ladies are in it together (as a flock of birds) saying "fuck yes, WE can!"

Also wanted to mention that Dina Wakley and Ranger Ink have launched a new monthly challenge which is called "show us your MEdia" which invite artists to show their art work over at their social media with #showusyourMEdia. How I incorporate ME in my media? Well I always try to show ME in the work I am doing, a little quirkiness and humor, are always things I try to add. This spread being no exception. I don't really write in art journals but I do like to incorporate text stamps to phrase a particular sentiment I might be feeling at that point. Or to vocalize a tone the work I have done is saying. Thank for this fun new challenge Dina Wakley and team!

And with that mouthful I am wrapping things up today. 
Have a great day and see you again soon :)

2017/05/19

Happiness - Mixed Media Notecard

Happiness

This card was made for friends of ours who got married recently. I used some left over gelli print where I die cut the sizzix wildflowers in. I outlined the flowers with a blue Marks All pencil and created some shadows with a water brush. The back showing through the flowers as well as the die cut moth (from Paper Artsy) is made with a large stamp from Lost Coast Designs, embossed with white WOW embossing powder and colored with a blending tool and distress inks. I matted the piece on a dark blue card on which I stamped words about love with versamark ink and embossed with a clear embossing powder by WOW. I also stamped some words on the moth as well as the gelli printed piece. A simple yet effective card to send someone well wishes on their new journey together. 

Thank you for stopping by and have a wonderful weekend!