Showing posts with label wow embossing. Show all posts

2017/11/10

Art Journal: Spiritual Journey

Art Journal: Spiritual Journey

Today I would like to share another Art Journal made with a lot of movement, color and soul.

This piece started on a gelli printed paper which I have applied color on with distress ink pads to give it a Galaxy color theme. Then stamped the wonderful Journey Collage stamp from Stampotique Originals with Jet Black Staz on ink. I stamped Scribble Circle from VLVS! in the middle and around the edges with Royal Purple Staz on and Versamark and applied gold embossing powder over it. After that heat set I added gold and white spatters. I love how this resembles fire flames from a sun. 

Art Journal: Spiritual Journey
The Text "we are on a Spiritual Journey" from that Journey Collage Stamp and the Face from Impression obsession became my focal points. The text was stamped on a left over piece of gelli print on which I have used a Prisms stencil by Stamplorations and I have added accents to it with a Tombow marker and a gold marker. Then adhered to the page in the composition you see here.

Art Journal: Spiritual Journey

I really love how this piece came together and while there is still so much going on, there is still some harmony over all.

I would like to enter this piece in the following challenges: 

This journal piece represents a fire within, a calm and peaceful flicker of a candle I always have during my meditation sessions and carry with me wherever I go. 

Take It, Make It Challenge

Moo Mania - Make it Feminine 


Thanks so much for stopping by and have a wonderful weekend!

2017/06/23

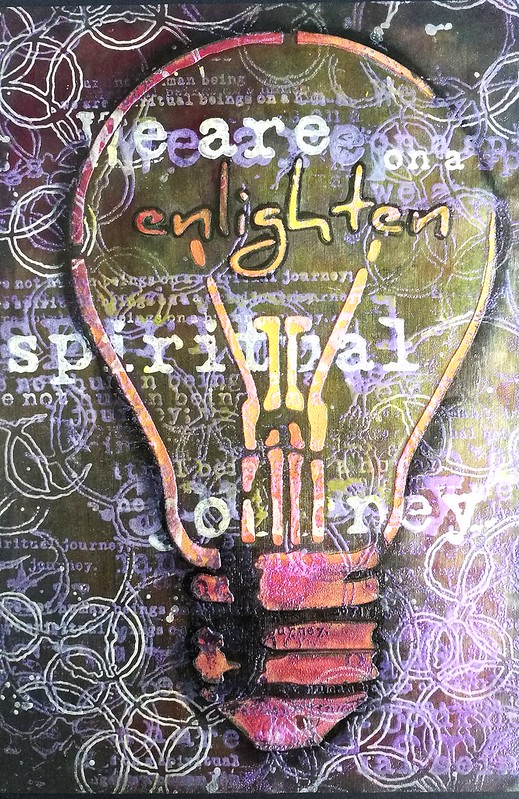
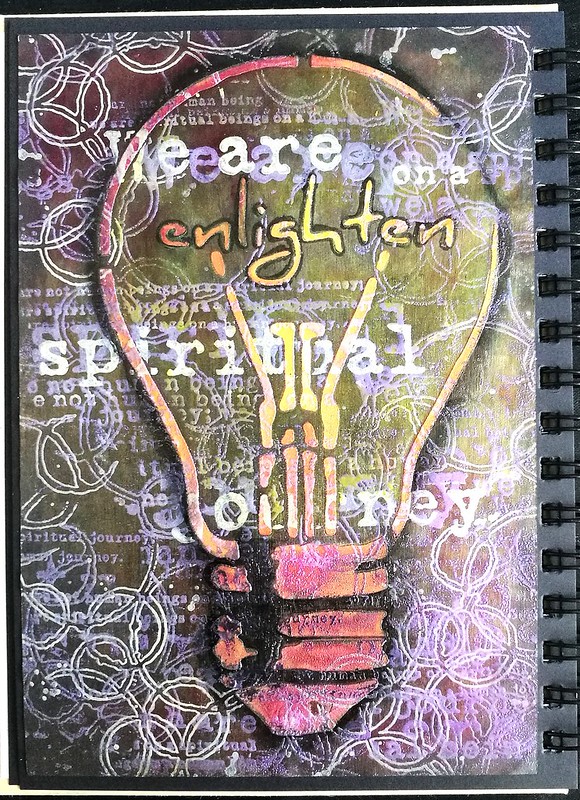
Art Journal: Enlighten we are on a spiritual journey

Art journal: spiritual journey

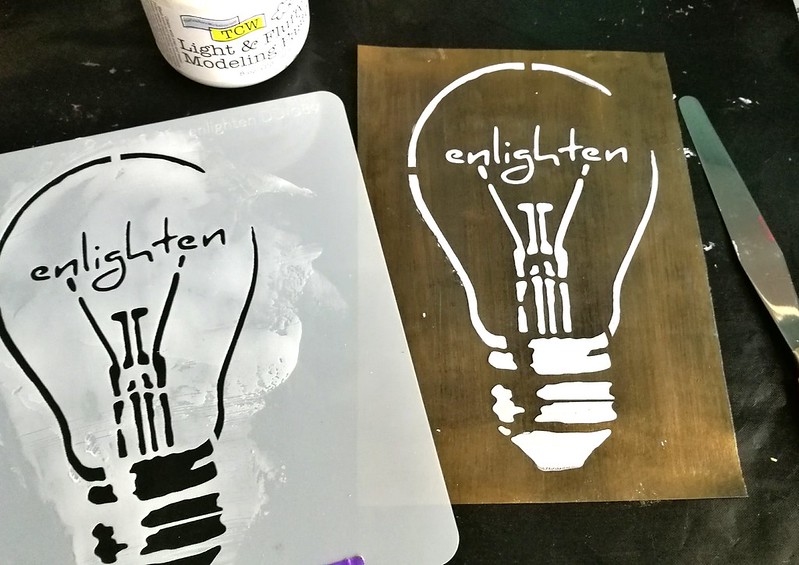
Today I would like to show you an experiment in my art journal using heat embossing over modeling paste. I've used the enlighten stencil from Donna Downey Studio's as my focal point in combination with this amazing Journey Collage stamp from Stampotique Originals.

Enlighten

I started off by prepping an A5 page with black and gold gesso from The Crafter's Workshop. Then I took my pallet knife and scraped some light and fluffy modeling paste (also from TCW)  through the stencil. I let this dry really well.

Enlighten
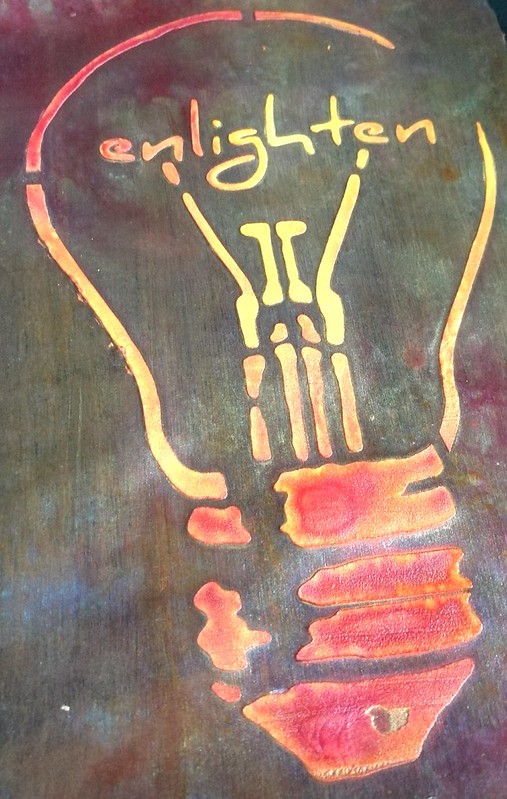
To add some color I sprayed some Dylusions sprays in yellow and red over it and some perfect pearl glimmer mist too. It gives the gesso's background also a really beautiful shimmery shine.

Art journal: spiritual journey
Sadly I don't have a in between photo of the embossed parts, because I had to work quickly but patiently not to over heat anything. I first stamped Carabelle Studio effervescence stamp and the Journey Collage stamp by Stampotique Originals with versamark and interference violet  WOW embossing powder over it. I heat set everything with my heating tool in parts making sure things didn't bubble up.  Then I took the effervescence stamp and stamped with versamark again on the corners and embossed with Opaque white embossing powder. I did the same thing with the words "we are on a spiritual journey" to emphasize that sentiment. When everything was heat set I spayed more sunshine yellow dylusions spray on the bulb and added neocolor in back for outline and shading. The word enlighten is outlines with a black posca marker. It's a gorgeous shimmery page in real life and I just love this mindful art journal page. 

I would love to enter this art journal page in the following challenges: 


Combining #32 and #36 of this past year's challenges


Thanks so much for stopping by and have a wonderful weekend!


2017/02/23

The dream catcher

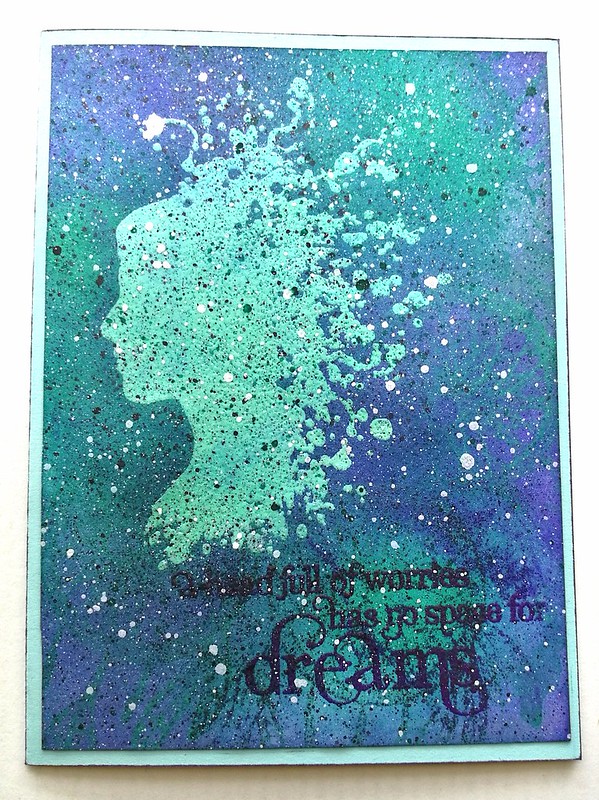
Head full of dreams

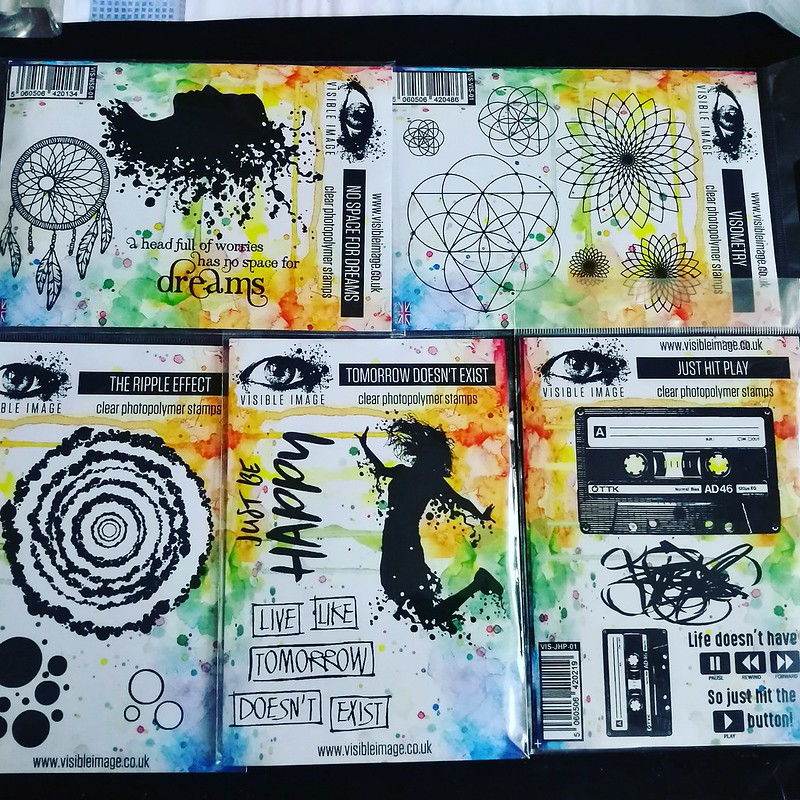
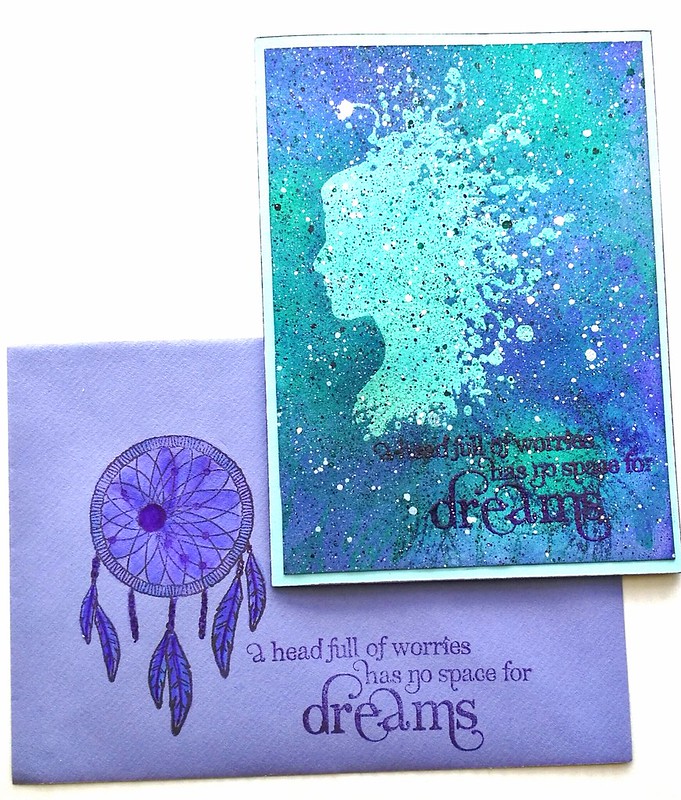
I finally had some time to play with these gorgeous Visible Image stamps which I had ordered in november during their black friday super sale, but sadly got lost in transit. Thanks to Helen and their excellent customer service, I did get all the stamps I ordered eventually. I made this card using stamps from THIS set which you see on the top right on the picture below.

Visible image stamps
My order from Visible Image. I am looking forward to use the other stamps as well! They are clear polymer stamps and a tip for you when you first start to use them as they can be very tacky coming right out of the package. To get some of that off, just use an eraser and rub over the stamp. The ink should take better when you've done that (of course don't forget to wipe away the eraser shavings!) I founs using colorbox, memento luxe or versamark (a slow drying rich ink) work best on these photo polymer stamps. You also get a better result when you emboss the image with clear embossing powder. That is what I have done with the card I am showing you today. 

Head full of dreams

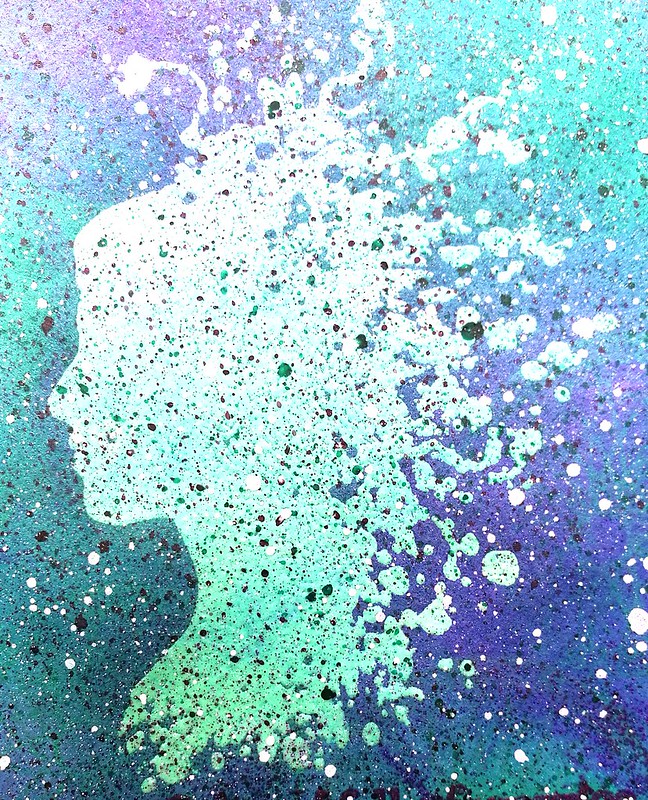
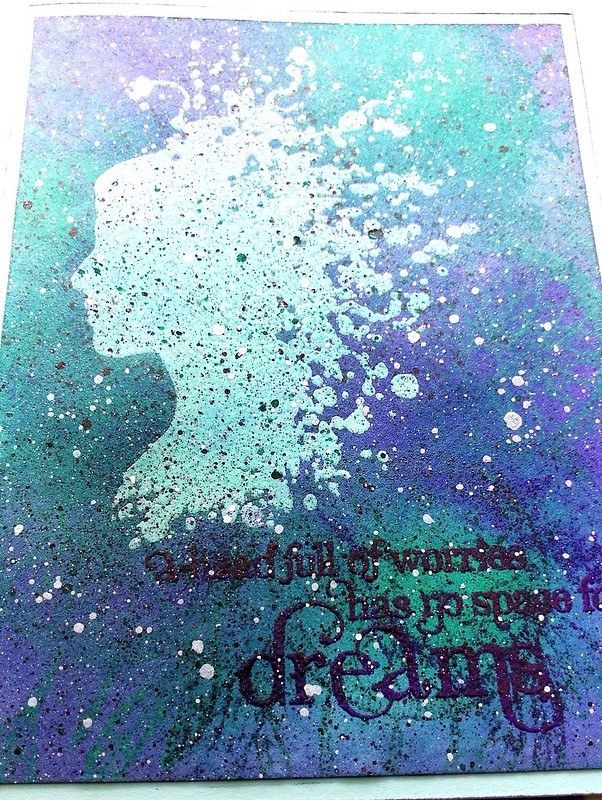
This head image is one of my favorites of their designs. Beautiful silhouette with whimsical hair. The card is fairly simply made, a clear embossed image on a blue card, colored the card with distress inks peacock blue, lucky clover and wilted violet by using a distress tool. Ink spatters done with liquitex titanium white, black and muted green and pink.

Head full of dreams
I stamped the dream catcher a couple of times with distress ink lucky clover and wilted violet. The sentiment "a head full of worries has no space for dreams" was embossed with WOW indigo embossing powder.

Head full of dreams
The envelope is decorated with the dream catcher and the sentiment to make a nice pair. And yes, I rather have my head full of dreams so there is no space for worries :)

Entering this in the TioT Let's get Messy Challenge because of all ink splats and messy look.


This card has heavy layers of ink, embossing powder and then more ink!

Thanks for stopping by and have a great day!


2016/05/09

Mailart Monday - Film Noir

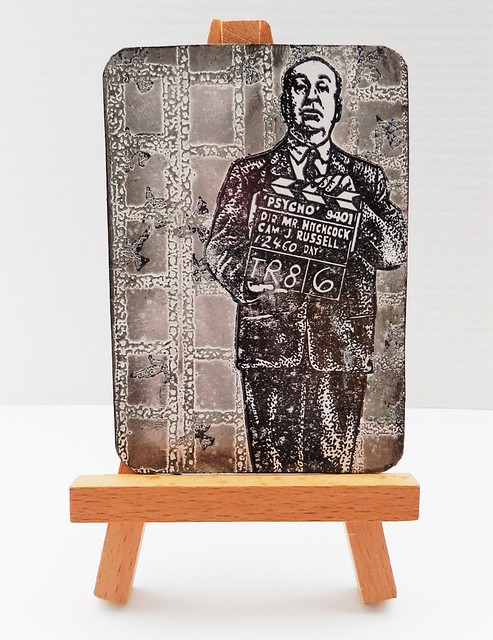
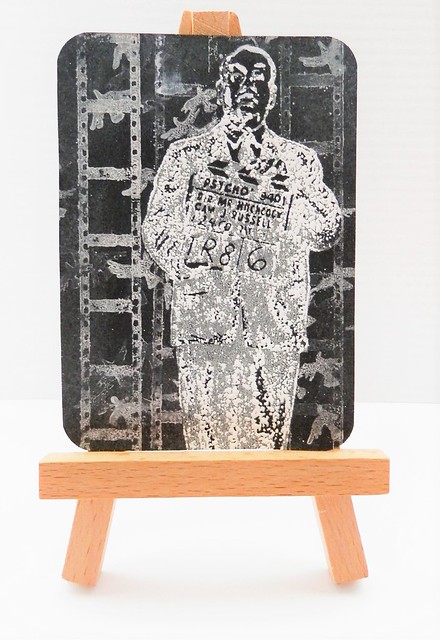
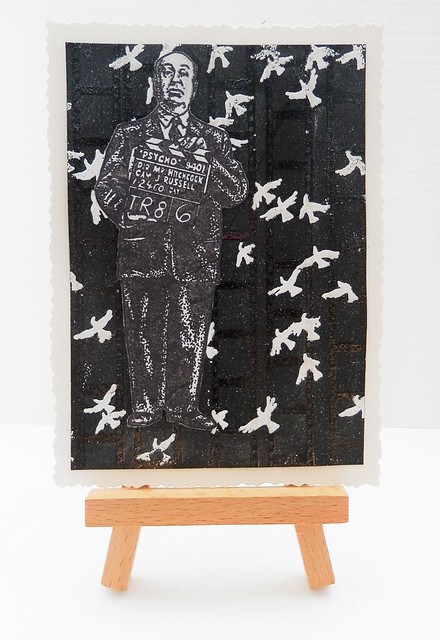
The theme for our monthly ATC swap at Inkadinkadutchies was black and white this month. As you know, I really love color so it was quite a challenge for me. But I had an idea and have the perfect stamps from Lost Coast Designs and Carmen's Veranda to execute this. I made a series of 2 ATC's and a note card called "Film Noir"

Mail Art 034-2016
The first ATC I made on photo paper. I stamped Hitchcock with staz-on black, masked it, stamped the birds and film strip with versamark and embossed it with WOW white embossing powder. Then I used black pear luster to give some shadow and definition. Rounded off the corners with a corner punch and that's it.

Mail Art 035-2016
For the second ATC I used black paper and staz-on opaque and Brilliance white to stamp the stamps on. I embossed a few accents on Hitchcock with the white embossing powder and used white pearl luster for accents on the back ground. Then also rounded off the corners with the punch.

Mail Art 036-2016
I made a card to accompany the set. Using black background and stamped the film border with versamark and embossed it with clear embossing powder. Then I stamped the birds stamp over it with versamark and embossed it with white powder.  The Hitchcock  I stamped on a separate piece of paper with memento black and cut out and adhered on top. Matted the piece on white glossy card stock and cut the edges with a figure scissor. The white specs in the background are from embossing powder that clung to the paper and got embossed too. I think it gives it a nice distressed effect :)

Quite pleased how these all turned out! With just a few stamps you can make such different things and you don't even need color! It was definitely a fun challenge for me. 

The stamps I used are Lost Coast Designs Filmstrip Border, Carmen's Veranda Flying Birds background and Carmen's Veranda Standing Alfred Hitchcock.

Our next ATC swap at Inkadinkadutchies is "put a word on it" and you can sign up by joining the swap on the events page. You can use any stamps from Lost Coast Designs and/or Carmen's Veranda in your project (a minimal of one). If you live in the EU you can order them through Inkadinkadutchies webshop, if there are stamps not on the site they can be special ordered for you. Just use their contact form. 
Hope you'll join us at the next swap :)
Thanks for stopping by!
namasté  

2016/04/29

A strong case of duality

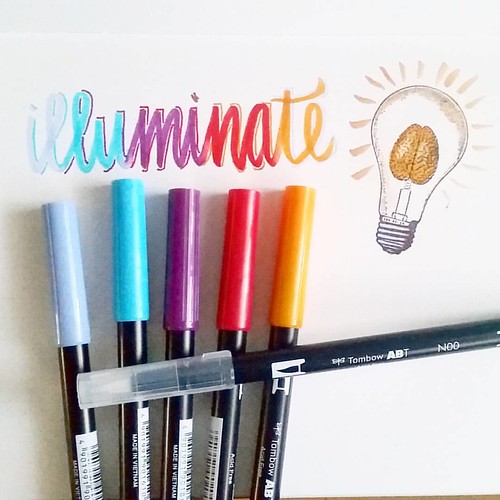
There are a lot of brush pens out there, but these Tombow dual brush pens have been around for a long time. I had tried them last year december at a workshop given by Miranda Degenaars in Posthumus Store in Amsterdam (where you can also buy them). It was great working with them, esp. since they blend nicely with water. I was trying to find an alternative for coloring to my Letraset and copic markers, which are not water soluble. I finally decided to get a few (ehrm... maybe a "few" is an understatement...) and did a couple projects with them already which wanted to share them with you here.

Working out some ideas for a new project #handlettering #tombowmarkers #tombow #lettering #craftyendeavors #craftiness #posthumus #brushletter #handwriting #writing #tombowlettering

So I have been noticing the hand/brush lettering rage on the social media networks. There are a lot of tutorials on you tube on how to use these tombows for hand lettering projects. I watched a lot of them and found them very useful and illuminating! Thanks to everyone whom has taken the time to do videos and uploading them, they are very helpful! I found the blog ByDawnNicole very useful! Tombow also have their own channel and blog with tips and tricks on how to use the pens. Traditionally they are used to color with and you can create a lot of fun background and lettering effects with the blending tool and some water. By the way, the light bulb brain stamp is from The Stempelwinkel and it's one of my favorites :) 

The following projects I used a resist technique. 

Letting project
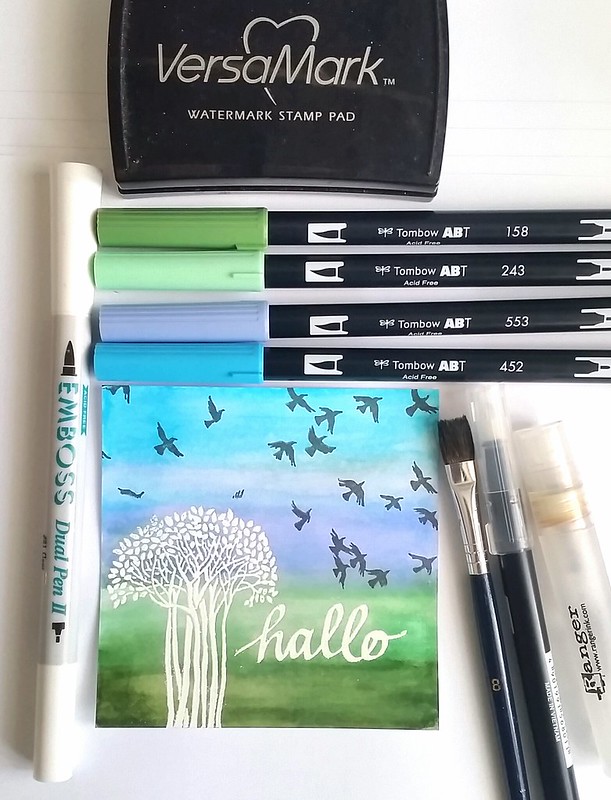
On white card stock I stamped the tree image with versamark ink and wrote 'hallo' with the embossing dual pen. I used Wow Bright white embossing powder and heat set it. The embossed parts will resist the inks. You can see the colors I used on top of the card. I used the brush tip to color directly on the paper, used water and a flat brush to create smooth, non streaky layers. Then with the blending brush I blended the transitions in colors, also added some more color and water here and there until I was satisfied with the result. I wiped away any residual ink that was left on the embossed parts with a paper towel. Then I masked the tree and word and stamped the Carmen's Veranda birds in flight stamp on the sky with Staz -on Stone Grey. Beautiful simple and effective result!

Letting project
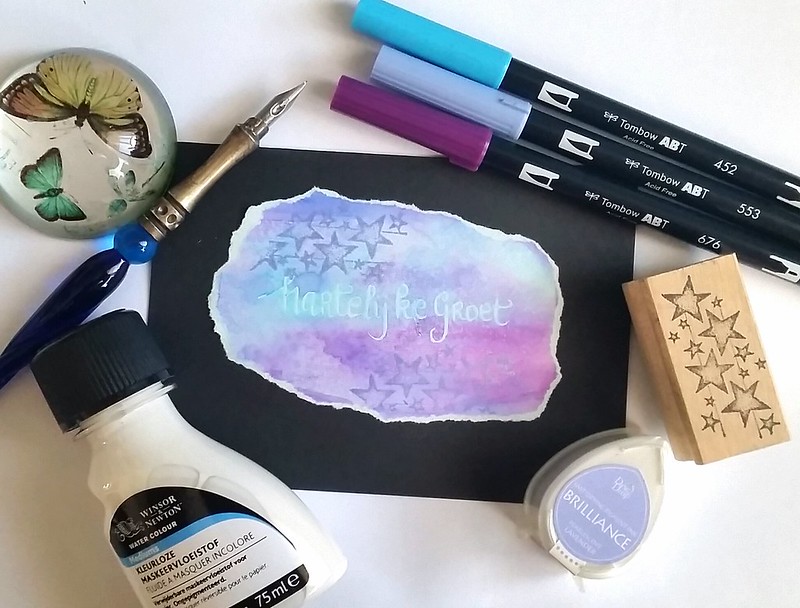
At Art specially I also bought some Winsor and Newton Masking Fluid which I always wanted to try out. The base is a light blue card stock and I used a dip pen to write down "hartelijke groet" (translated "with kind regards" in English) on it. It dried up clear and then I colored the around and over the words. Spritzed it with water and used a flat brush to blend the colors a bit. I dried it with my heat tool, stamped the star stamp with Brilliance lavender on top and bottom of the words. I rubbed off the masking fluid, and the light blue words are showing clearly through the colored background. It surprised me that it stuck so well to the paper! Such a fun effect! I ripped the edges off and matted it on a black note card which make the colors pop out even more.

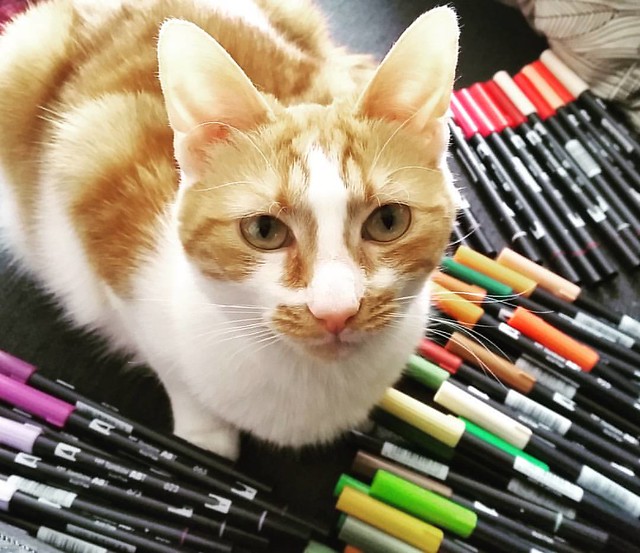
My cute little helper 😻 #meeshathecat #meesha #colorcoordination #tombowmarkers #tombow #tombowusa #tombowbrushpen #craftyendeavors #craftmaterials #craftygirl
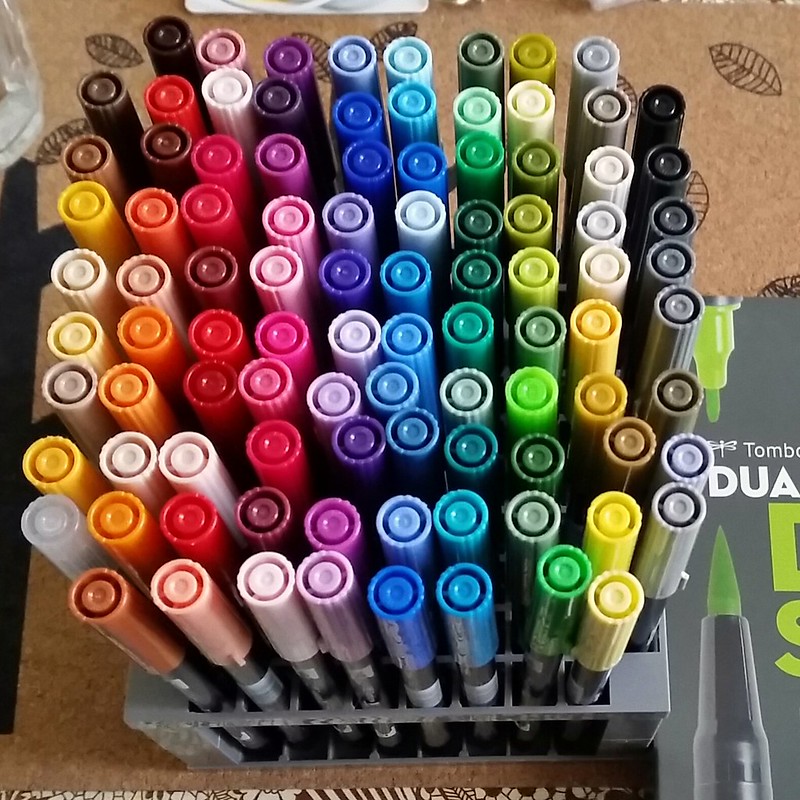
I am completely loving these brush pens and eventually (after long internal debate) got the full set of 96 colors (found a great deal on the set through Marktplaats otherwise yeah they are pretty costly to get!) with the desk stand. My little Meesha was helping me organize the colors in the numerical range which I then placed in the desk stand. 

Tombow full set dual brush pens
They definitely do look awesome standing all together, don't you think? I'm looking forward to use these in more projects which I'll definitely be sharing with you here.
I have them standing on my desk now, which would, I hope, prompt me to use them often.  

What are favorite pens to color with? 
Have you tried these brush pens? 

Oh and If you don't follow me on instagram yet, you might like to know I am hosting a giveaway for a calligraphy pen

You can still enter until tomorrow :) 
Thanks for stopping by!

Have a wonderful creative weekend.

namasté