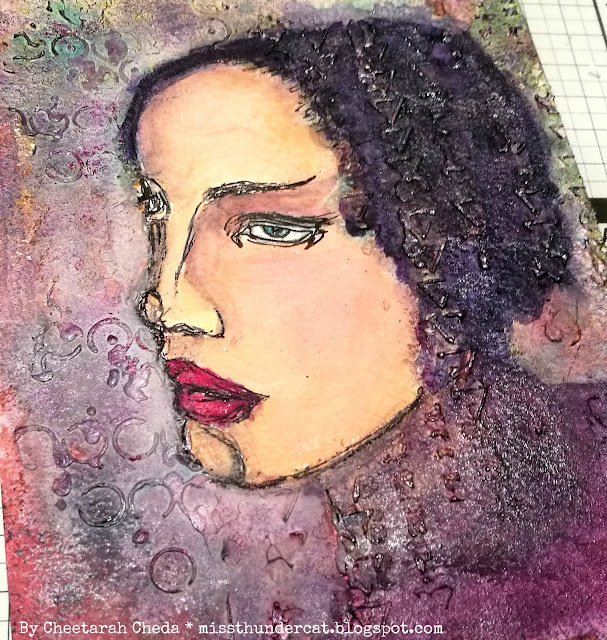
Hi all, the weeks go by so quickly! Today I'm sharing my 4th project as guest designer for AALL & Create and I've used a bunch of stamps from the new release and one stencil from the first release ever to create this whimsical looking dream queen in my art journal. Let me tell you a bit how I created her.
The base is Windsor an Newton 300lbs watercolor paper because I'm going to use a lot of mediums on this project. I stamped the face by Katy Paltridge of set 129 with Versamark onyx black ink and the large stamp sets 109 and 110 by Tracy Evans with Kalaeidacolor ink pads in autumn colors over the face in the background for texture.
At a recent shopping spree I bought the stencil #6 by Autour de Mwa which is from the first AALL & Create release ever. I really wanted to use it for this project to create some grungy texture. I made a mask for the face & then applied gesso & then added the modeling paste through the stencil. I let it dry really well because am going to use some color sprays over it next.
A close up of the grungy texture around the face.
I left the mask on when I applied the Lindy's magical home made sprays - I have used colors from the Autumn leaves set, Autumn Maple Crimson and Ponderosa Pines Olive and Shabby Turbine Teal from the Industrial Chic set. After I dried the color sprays I took off the masks and applied gesso to the face. I love how you can see the background texture here.
Then I went to work with acrylics from Dina Wakley & Thalens Amsterdam. I just applied layers of flesh tones colors mixed with blush colors until I was happy with the result. The lips are covered with a layer of shimmer from the Spectrum Noir Sparkle pen.
So at this point I left the project on my desk for a few days because I didn't quite know how to continue. And then I decided I wanted to create some hair for her and grabbed some more acrylic paints.
I added some dark blue acrylics to give her hair and completely transformed the way she looked as the tones turned into a deep purple to violet where it mixed with the red from Lindy's. I applied gesso over some bits to soften the colors and she looks so different now! It was time for some embellishments and I sprayed some paper flowers with the before mentioned Lindy's colors.
In the center of those flowers I applied a bit of yellow acrylic paint and placed a see through domed sticker over it to give the flowers some dimension. Some gold splatter for finishing touches and the little flower crown I made with Tracy's grungy flower stamp from set 123.
Some gold splatter for finishing touches and I made the little flower with a part of Tracy's grungy flower stamp from set 123. I also stamped the work dream on there from the same set.
I had a lot of fun experimenting with color & texture on this one & watch "the Dream Queen" come to life.
Hope you liked seeing this project with gorgeous AALL & Create stamps. Please visit their boutique to shop online or to see where you can get these stamps from their many stockists world wide.


FANTASTIC ! Wow!
ReplyDelete