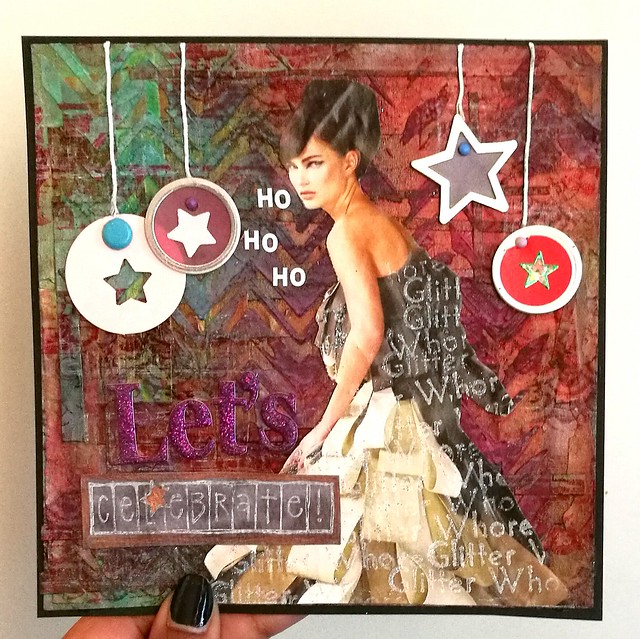
The holiday weekend is coming up and I wanted to show you a mixed media art collage I made in the spirit of the season.
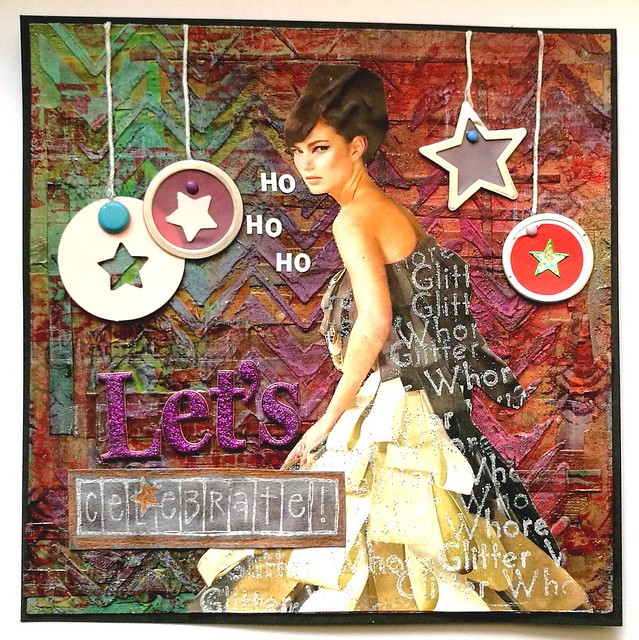
I love how fun and quirky she turned out. The whole piece came together bit by bit. I wanted to use the fashionista cut out as center piece and the stamp "glitter whore" from Viva Las Vegas Stamps cemented it. I just stamped the phrase all over her dress with Brilliance cotton white and embossed it with WOW silver glitter. A full list of items used for the piece is at the bottom of this post.
Let me show you a bit of the process.
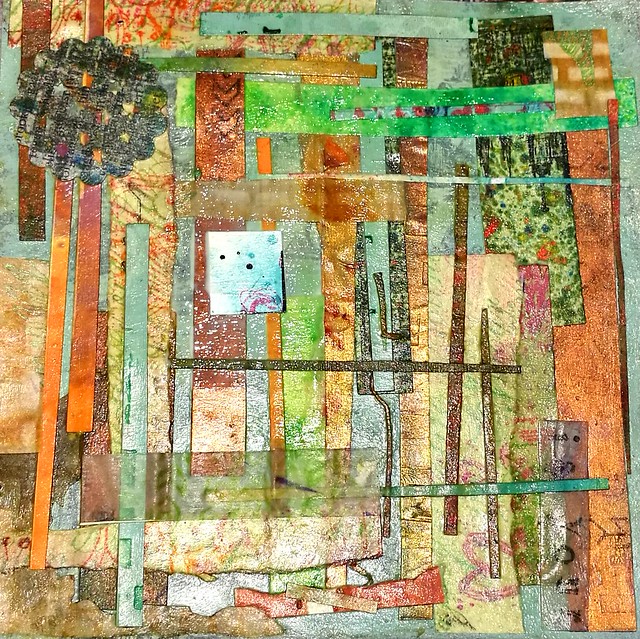
After I cleaned my desk I found all these leftover trims I did from various projects I did over the year. Yeah, shows you how often I clean my desk, heh... Instead of tossing them in the trash, I glued them all onto a 6x6 scrapbook paper which was already painted with a coat of baby blue ground paint. I used Modge Podge Matte for this. I usually don't like to use this medium as a finish, but as a base glue for collage it's very well suited. All the little pieces stuck together really nicely.
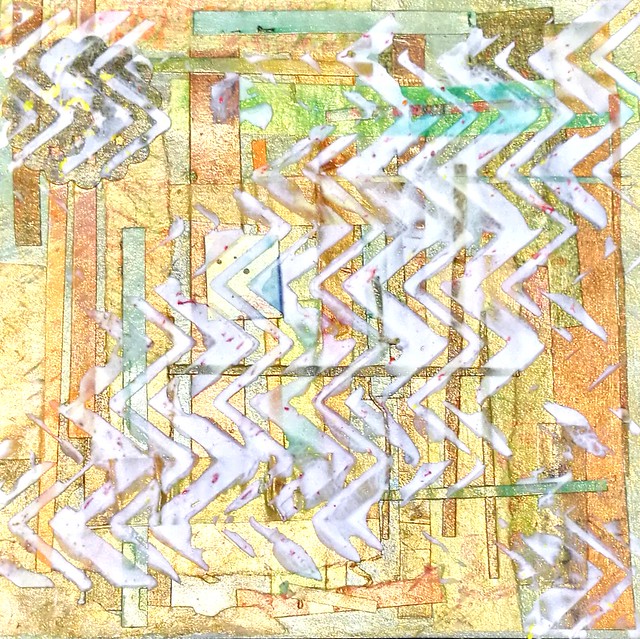
Then I coated the piece with a layer of Gold Medium from the Crafter's Workshop. It gives a nice translucent golden shimmery finish. After that dried I took a chevrons stencil and applied some of that Marshmallow fluff stuff, aka the light and fluffy modelling paste from TCW. honestly, it's SO light and fluffy and works really well over stencils. I wanted a bit of a messy look so I scraped over a few parts here and there.
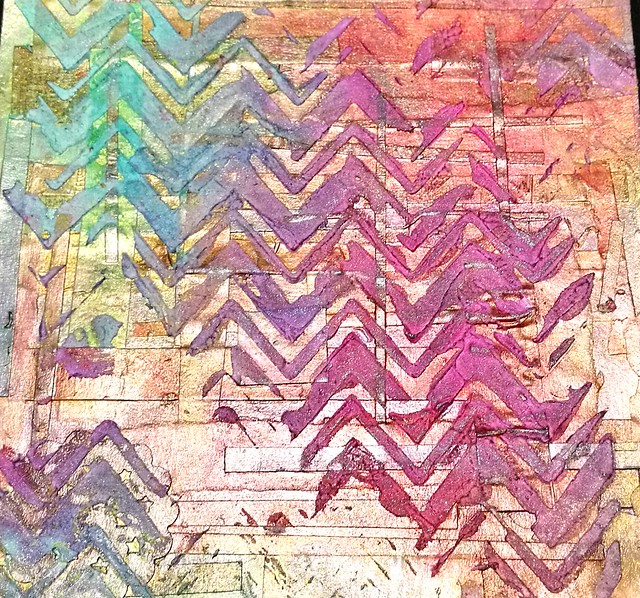
After that dried and hardened I went to work with some color. I used Distress stains for this, dabbed the colors directly onto the aria's and sprayed water with the mini mister on it. I let the colors overlap and wiped away some excess inks rolling off the page with a kitchen towel. Did this a couple of times until I was satisfied with the color scheme and saturation. You can't really plan that out, but I stopped when this beautiful transition of blue, purple red to pink appeared on the raised surface. I let this dry really well overnight. This is the base for the card. I only added some stamping to the background to create a bit more diversity in the grungy look and then basically glued all the other pieces on top of it.
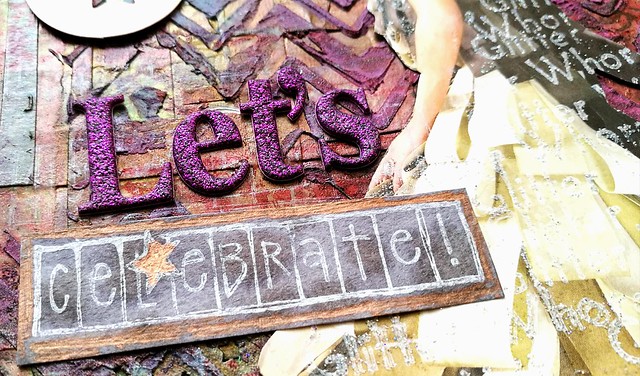
I have a ton of letter stickers but rarely use them. However this is definitely the occasion to use those pink fluffy sparkly stickers! The celebrate stamp I have had for years and it's a favorite to use this season. I stamped that with Dovecrafts cotton white on a piece of aquarelle paper which I had colored with grey ink. The edges and star I colored in with a bronze paintmarker.
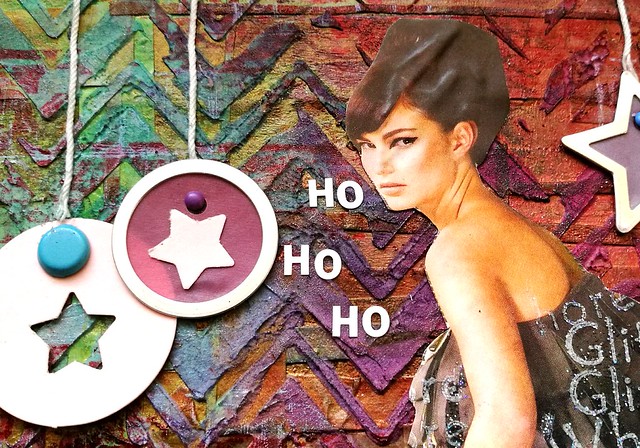
Adding metallic fortified shaped labels at the top made it look more festive. Used a paper punch for the stars on the left side. I adhered them with brads to keep them in place. Gluing on the baker's twine was hell as it kept unraveling and didn't stick well to the glue. But after a few attempts they finally got on there straight. well straight-ish. Also to share with you my humor; I find it very amusing that the "glitter whore" says "ho, ho, ho" :D I matted the piece on black card stock and called it done.
So whatever you are celebrating, Christmas, Channuka or just the New Year which is lurking around the corner, I am wishing you all a sparkling, glittery, amazingly festive holiday season!
Thanks for stopping by!
Namasté
I'm entering this piece in


______________________________________________________
Materials used for the holiday card project:
Paper:
Scrapbook paper 6x6 inch
Leftover trims from various projects
Fashion magazine cut out
Paper round shaped tag
Aquarelle paper
Black cardstock
Mediums/Glue:
Modge Podge matte medium
Crafter’s Workshop Gold Gesso
Crafter’s Workshop Light and Fluffy Modeling paste
Uhu Gluestick
Uhu clear universal glue
Ink/paint:
Ground paint in baby blue
Distress Stains: lucky clover, fired brick, dusty concord
Dovecrafts white inkpad
Brilliance ink in cotton white
Staz-On ink: Cheery Red, Royal Purple and Stone grey
Stamps:
Viva Las Vegastamps; Glitter whore & numbers
Designs by Rynn; texture
Kolette Hall for Hampton Arts; Celebrate
Various:
Mini mister water spray
Metallic edged round and star shaped tags
Star paper punch
Baker's Twine
Round Brads
Glitterpuff letter stickers in pink
Plastic letter stickers in white
Chevrons stencil
WOW silver glitter embossing powder
Bronze Edding Paintmarker

